
Last updated 17 August 2026 by Sammie O, owner of Bud Car Wash in Ras Al Khor Industrial Area 2, Dubai.
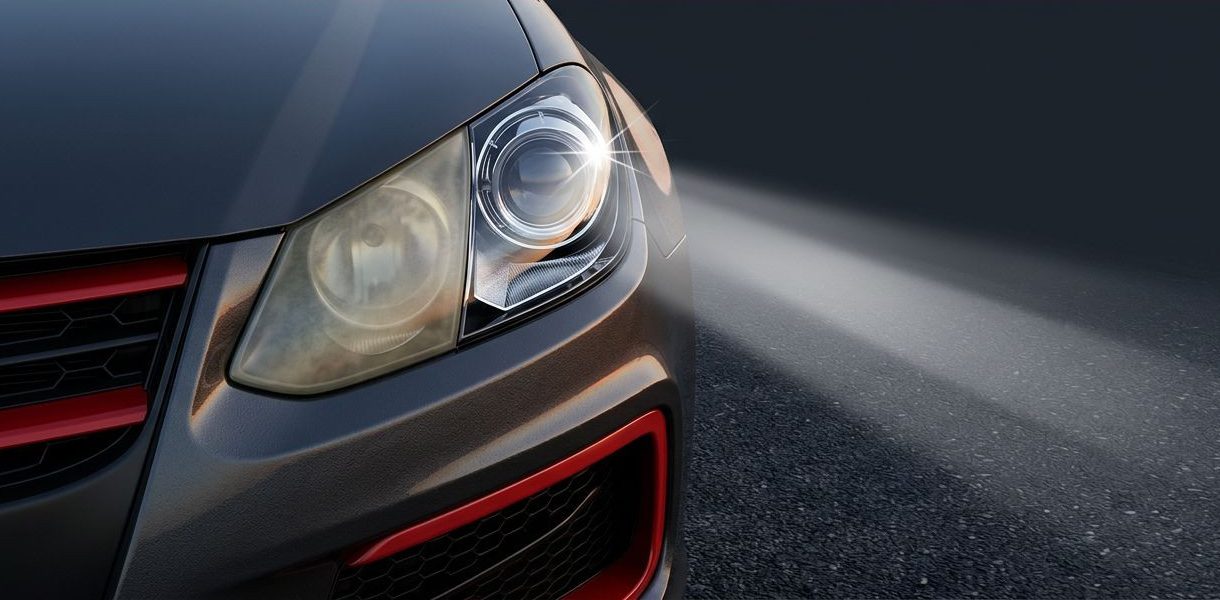
Cloudy headlights can make a well-maintained car look older, but reduced clarity can also affect nighttime visibility. If you want to clean headlights and restore a clearer beam at home, wiping the lens with soap won’t remove baked-on oxidation.
Light haze often responds well to plastic polish. Heavy yellowing needs wet sanding, polishing, and a UV-protective sealant. The work usually takes 45 to 90 minutes for both lenses, followed by curing time. Start with a careful inspection.
Want us to do it instead?
We do window and glass protection at our Ras Al Khor bay, 24 hours a day. Fill this in and we reply with a price and a time. The message writes itself, so you only tap send.
Would rather talk? Call +971 55 168 5050. Someone answers 24 hours.
Before you clean headlights, check the lens
A dull yellow or grey film on the outside of the lens is usually oxidation. Sun exposure, heat, dust, and road grime can damage the outer plastic surface over time. If the lens is smooth but cloudy, home restoration may improve its appearance and light transmission.
However, not every headlight problem is external. Internal moisture, cracked plastic, damaged reflectors, burned bulbs, or electrical faults need a different repair. Restoration won’t repair a severely cracked lens or damage inside the housing.
Separate surface oxidation from internal damage
Run your fingertips across the lens after washing it. A rough, chalky, or uneven surface points to oxidation on the outside. Look at the headlight from several angles. Surface damage normally appears as yellowing, white haze, or fine scratches across the exposed lens.
Condensation inside the housing is a separate issue. Check for droplets, pooling water, or fog that appears behind the lens. The housing may have a failed seal or blocked vent. A replacement seal, housing repair, or professional inspection may be needed.
Turn the lights on for a few minutes and compare both sides. If one beam stays dim after the lens is clean, check the bulb, wiring, and headlight alignment.
Prepare the work area and tools
Work in a shaded, well-ventilated area with the lights switched off and completely cool. Avoid restoring headlights under direct sunlight or on a hot body panel. Heat can dry products too quickly and make the finish uneven.
You can use a complete restoration kit, or buy each item separately:
- Car shampoo, clean water, and microfiber towels for washing.
- Automotive painter’s tape to protect the paint around the lens.
- Waterproof sandpaper, usually in grits between 800 and 3000.
- Plastic polish and a foam applicator or polishing pad.
- A headlight-specific UV sealant or clear coat.
Wear safety glasses and gloves during sanding. Keep water away from exposed electrical connections. Have several clean towels available, because a towel used on dirty paint shouldn’t touch the finished lens.

How to clean headlights without damaging the paint
The safest way to clean headlights is to start with the least aggressive method. Sanding removes damaged material, so it shouldn’t be the first choice for light surface haze.
Wash first and protect the surrounding panel
Rinse loose dust from the car’s front end. Wash the headlight with car shampoo and a clean microfiber towel. Pay attention to the edges, where dirt and wax residue often collect. Rinse again and dry the lens completely.
Apply two or three layers of automotive painter’s tape around the headlight. Cover the painted bumper, fender, grille, and trim close to the working area. Masking takes only a few minutes, but it prevents accidental sanding marks and polish stains.
Never sand a dry, dirty lens. Dust trapped under the paper can create deeper scratches that take longer to remove.
Try a plastic polish before sanding
Apply a small amount of automotive plastic polish to a foam pad. Meguiar’s PlastX and similar products are designed for clear plastic surfaces. Work by hand with steady pressure, or use a polishing pad on a drill at low speed if the product instructions allow it.
Polish one small area first. Wipe the residue away and inspect the result under good light. If the lens looks clearer, repeat the process across the entire surface. This method usually takes 10 to 20 minutes per lens.
Household mixtures can remove some grime, but they don’t replace a proper UV sealant. Home Depot’s guide to cleaning headlights discusses baking soda and vinegar as a DIY option. Toothpaste may create a short-term shine, while vinegar can mark nearby paint if it dries on the surface. Avoid acetone, paint thinner, brake cleaner, rough scouring pads, and abrasive kitchen sponges. These products can stain or scratch plastic and automotive paint.
Wet sanding removes heavy yellow oxidation
If polishing alone doesn’t remove the yellow film, wet sanding can level the damaged outer layer. It leaves the lens looking uniformly dull at first. That is normal. The clarity returns during polishing.
Choose the grit based on the condition
Start with the least aggressive grit that can remove the damage. A lens with light haze may need 1500 or 2000 grit first. Heavy yellowing or deep surface scratches may need 800 or 1000 grit.
Move through the grits gradually. A common sequence is 800, 1000, 1500, 2000, and 3000. You may not need every step. Each finer grade removes the scratches left by the previous one.
Soak the waterproof paper in clean water before use. Keep the lens wet with a spray bottle. The water carries away plastic residue and reduces heat during sanding.
Sand in a controlled pattern
Wrap the paper around a soft sanding block. Sand the lens with light, even pressure. Use horizontal strokes with one grit, then vertical strokes with the next. This pattern makes it easier to see whether the earlier scratches have disappeared.
Keep the paper moving across the full lens. Don’t concentrate on one small spot or press hard against the edges. Re-wet the surface often, and wipe it with a clean microfiber towel to inspect your progress.
Stop only when the lens has an even, dull appearance with no remaining yellow patches. If shiny spots remain, the old coating or oxidation is still present. Continue carefully with the same grit before moving to a finer grade.
A useful visual reference is this illustrated five-step headlight restoration guide. It shows the general sanding and polishing sequence, but always follow the instructions supplied with your own product.

Polish the lens and apply UV protection
Wet sanding improves the surface, but it doesn’t create the final clear finish. Polishing removes the fine sanding marks, while the protective coating helps slow future oxidation.
Polish until the haze is gone
Rinse the lens thoroughly after sanding. Dry it with a clean microfiber towel, then inspect it for leftover grit. Apply plastic polish with a fresh foam pad and work in small sections.
Use firm but controlled pressure by hand. If you use a drill, choose a low speed and keep the pad moving. Excessive heat can soften the plastic or create uneven marks. Wipe away residue often so you can check the actual finish.
The lens should become clear and smooth when viewed from different angles. If it remains cloudy after thorough polishing, the sanding may not have removed all of the damaged surface. It may also have internal damage or severe plastic deterioration.
Seal the surface before driving
Apply a dedicated headlight UV sealant, headlight coating, or the finishing product included in your restoration kit. The lens must be clean, dry, and free from polish oils. Use thin, even coats and keep the product off the paint.
Follow the product’s drying and curing instructions. Some finishes need several hours before contact and longer before washing. Keep the car in a clean, shaded area during that time. Dust, water, and fingerprints can become trapped in a fresh coating.
This 3M headlight restoration demonstration shows a kit-based process that includes polishing and a clear protective finish. A separate wet sanding, polishing, and sealing walkthrough can also help you compare the stages before starting.
Know when headlight restoration won’t be enough
Headlight cleaning works best when the problem is limited to the outside surface. A professional assessment or replacement is safer when the housing has structural or internal damage.
Watch for cracks, moisture, and inside damage
Don’t sand over a lens with a deep crack. Water can enter through the opening, and sanding won’t restore the housing’s protection. Fine internal cracks, called crazing, may also remain visible after surface work.
Persistent condensation suggests a sealing or ventilation problem. A new UV coating won’t stop water from entering. If the reflector is burnt or the light output is weak, replacing the bulb or housing may be necessary.
Take extra care with LED and adaptive lighting systems. Their internal parts can be costly, and access may require specialist knowledge. Ask a qualified technician to inspect the unit when the fault isn’t clearly on the outer lens.
Check the beam after the repair
After the coating has cured, test the headlights in a safe location. Park on level ground facing a wall and compare the two low beams. Don’t stare directly into the lights.
The beam should look even, with no major dark patches caused by the bulb or reflector. Clear lenses can improve the light that reaches the road, but they won’t correct poor alignment or an electrical fault. Have the headlights adjusted if one beam points higher or lower than the other.
Keep clean headlights clear for longer
A completed restoration needs regular care. The protective coating is exposed to the same sun, heat, dust, and road contamination that caused the original haze.
Wash gently and protect from sun
Use pH-neutral car shampoo and a soft microfiber towel during routine washes. Rinse away sand before wiping the lens. Never use a dry cloth on a dusty surface, because the particles can create fine scratches.
Remove insects, bird droppings, and oily road film as soon as practical. Park under cover when possible. Dubai’s strong sunlight and dusty conditions can shorten the life of an unprotected finish.
If you apply a paint sealant or protective film, check that it is suitable for plastic headlights. Don’t use an abrasive compound at every wash. That can gradually wear down the protective layer.
Inspect the finish regularly
Check the lenses once a month for new haze, peeling, or rough patches. Reapply the recommended sealant at the interval listed on its label. Products vary, so a fixed renewal schedule doesn’t suit every coating.
If the lens begins to yellow again, address it early with plastic polish. Light maintenance is faster than removing heavy oxidation a second time. When the surface is badly damaged, a professional detailer can restore both lenses with controlled equipment and a consistent protective finish.
Conclusion
You can clean headlights safely at home when the damage is external and the lens is structurally sound. Wash and mask first, polish light haze, wet sand heavy oxidation, and finish with a headlight-specific UV coating.
The protective step matters as much as the polishing. Without it, clear plastic is exposed to the same sun and heat that caused the cloudiness. A careful process restores a cleaner appearance and can improve nighttime visibility, but cracked, wet, or internally damaged headlights need a proper repair.
Get a price on window and glass protection
Shop #7, 44, 22nd Street, Ras Al Khor Industrial Area 2, open 24 hours. Tell us the car and we reply with a price and a time.
Would rather talk? Call +971 55 168 5050. Someone answers 24 hours.
See us first on Google
Google lets you choose the sites you want to see more of. Add Bud Car Wash as a preferred source and our car care guides show up more often in Top Stories and in Google’s AI answers.
Opens Google in a new tab. You can remove us again at any time.

Sammie O is the owner of Bud Car Wash, a 24 hour hand car wash and detailing shop at Shop #7, 44, 22nd Street, Ras Al Khor Industrial Area 2, Dubai. He writes the car care guides on this site based on work done in his own bay.
View All Articles