
Last updated 18 August 2026 by Sammie O, owner of Bud Car Wash in Ras Al Khor Industrial Area 2, Dubai.
Black paint shows every reflection, which makes minor washing damage look worse than it is. If you want to reduce swirl marks on a black car, the safest approach starts before polishing: remove grit without dragging it across the clear coat.
Aggressive scrubbing, dirty towels, automatic brushes, and rushed drying can add fine circular marring. A careful wash, proper inspection, and measured correction process can improve the finish without removing more clear coat than necessary. Start by identifying the type of defect on the paint.
Want us to do it instead?
We do detailing and surface protection at our Ras Al Khor bay, 24 hours a day. Fill this in and we reply with a price and a time. The message writes itself, so you only tap send.
Would rather talk? Call +971 55 168 5050. Someone answers 24 hours.
What Swirl Marks Look Like on Black Paint
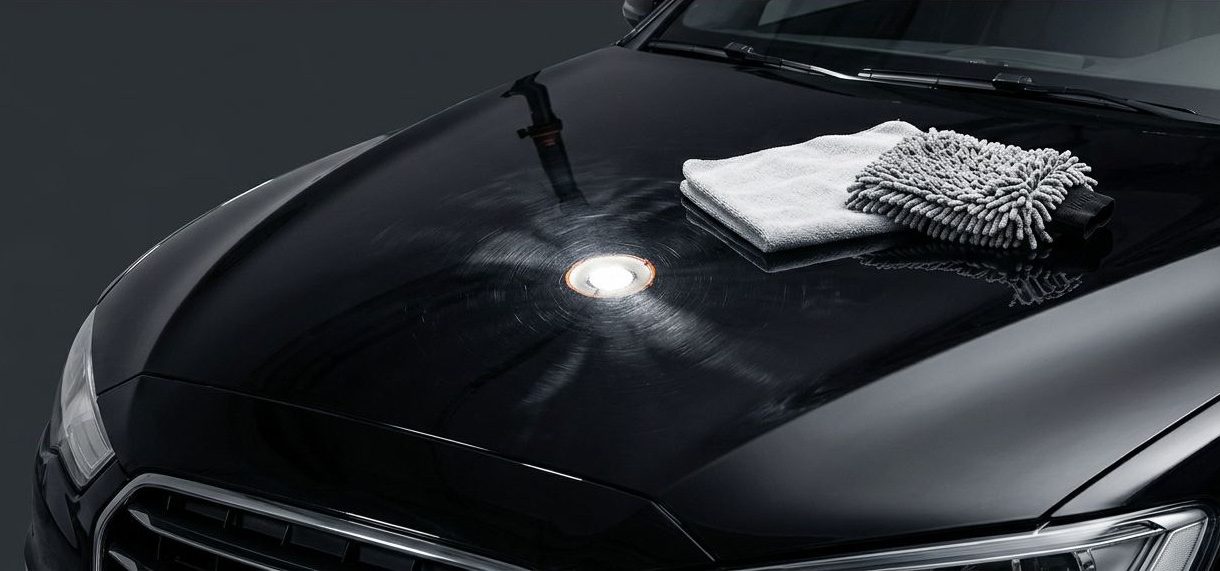
Swirl marks are fine scratches in the clear coat. They often appear as circular or spiderweb-like lines around a bright light source. Black paint makes them easy to see because the dark surface creates strong contrast against reflected light.
These marks usually come from friction. Dust, sand, road film, and trapped dirt can scratch the paint when a mitt, sponge, brush, or towel moves across the surface.
Light surface marring
Light marring stays within the upper part of the clear coat. You may see a hazy pattern under direct sunlight or an LED inspection light, but the marks don’t usually catch your fingernail.
This type of damage can often be improved with a careful wash, paint decontamination, and a mild finishing polish. Complete removal isn’t always necessary or advisable. A paint correction removes a small amount of clear coat, so the goal should be a cleaner, sharper reflection with a sensible amount of correction.
Deeper clear-coat damage
Deeper scratches may catch your fingernail, show a white or gray line, or reveal a change in color. If the scratch reaches the basecoat or primer, polishing won’t restore the missing paint.
Paint correction removes microscopic amounts of clear coat to level the area around a defect. It can’t safely remove every scratch, especially when the clear coat is thin or the damage is too deep. Repeated aggressive polishing can create a bigger problem than the original mark.
Inspect the Paint Before You Reduce Swirl Marks
Good inspection prevents unnecessary correction. Wash and dry the car first, then examine one panel at a time under controlled lighting.
Use proper lighting
Bright sunlight can reveal swirl marks, but it can also create glare that hides smaller defects. An LED inspection light with a focused beam gives you a clearer view in a garage or shaded area.
Move the light across the panel and look at the reflection from different angles. Check the bonnet, doors, boot, roof, and areas behind the door handles. A clean black car may show marks that were hidden by dust, wax, or road film.
Avoid inspecting hot paint under direct sun. Heat can dry products quickly and make polishing harder to control.
Clean the surface before judging damage
A dirty panel can make contamination look like scratches. Use a proper automotive shampoo, rinse the surface well, and dry it with clean microfiber towels before making a decision.
Don’t assume every mark needs compound. Some stains, water spots, and residue sit on top of the clear coat and need cleaning or decontamination instead. If a mark disappears when the panel is wet, it may be light marring or surface residue rather than a deep scratch.
Wash and Dry a Black Car Without Adding New Marks
The best way to reduce swirl marks over time is to prevent new ones during routine washing. Every contact with the paint should be gentle, well-lubricated, and free from loose grit.

Keep wheel tools away from painted panels
Clean the wheels and tyres with separate brushes, mitts, buckets, and towels. Brake dust can contain abrasive particles that shouldn’t touch the car’s paint.
Wash the wheels before the body if possible. If your wheel tools touch the ground or collect heavy dirt, keep them away from every painted surface. Use a dedicated microfiber wash mitt for the body.
Rinse, lubricate, and work from top to bottom
Start with a thorough rinse to remove loose sand and dust. Apply a pH-neutral car shampoo made for automotive paint, then use a clean microfiber or lambswool mitt with plenty of solution.
Work in small sections, starting with the roof and upper panels. Rinse the mitt often, and use a second bucket for rinsing if you follow a two-bucket method. Don’t press hard against the surface. Let the mitt carry the shampoo across the panel.
Lower doors, bumpers, and areas behind the wheels hold more grit. Leave them until the end, then rinse the mitt before returning to the upper panels. Never use a dry towel to wipe dust from black paint.
Dry with minimal friction
A clean, plush drying towel is safer than an old bath towel or rough household cloth. Lay the towel flat and gently blot or pull it across the panel with light pressure. A filtered air blower can remove water from mirrors, grilles, badges, and panel gaps before the final towel pass.
Replace a towel if it falls on the floor. One trapped stone can create fresh marks across a large panel. For more practical drying advice, see these black paint care tips.
Decontaminate Before Polishing
After washing, run clean fingertips over the dry paint inside a thin plastic bag. If the surface feels rough, bonded contamination may be stopping the paint from feeling smooth.
Choose chemical decontamination first
An automotive iron remover can help dissolve embedded iron particles when the product label says it’s safe for painted surfaces. Tar removers can help with road tar, but they also need correct use and thorough rinsing.
Apply products to cool paint, follow the stated dwell time, and don’t allow them to dry. Test unfamiliar products on a small area first. Household cleaners aren’t universal solutions for automotive paint, and some can stain trim or weaken existing protection.
Use clay carefully
A clay bar or synthetic clay towel can remove bonded residue, but it can also add marring when used with too little lubricant or too much pressure. Use plenty of clay lubricant, work lightly, and fold or clean the material when it becomes dirty.
If the paint feels smooth after washing and chemical treatment, skip clay. Every extra contact with black paint creates another chance for fine scratches. This DIY guide to removing swirl marks provides additional product and process guidance.
Polish Only When the Paint Needs Correction
Polishing can reduce swirl marks by refining the upper clear coat. It isn’t the same as applying wax. Wax can improve gloss and add protection, but it won’t level scratches in the paint.
Start with the least aggressive method
Use a small test spot before polishing the whole car. Choose a mild finishing polish and a soft foam pad first. Apply the product to a limited section, work it according to the manufacturer’s instructions, and wipe the residue away with a clean microfiber towel.
Inspect the test area under the same light used earlier. If the finish improves, repeat that method across the car. If it doesn’t, move to a slightly stronger polish or pad only when you understand the added risk.
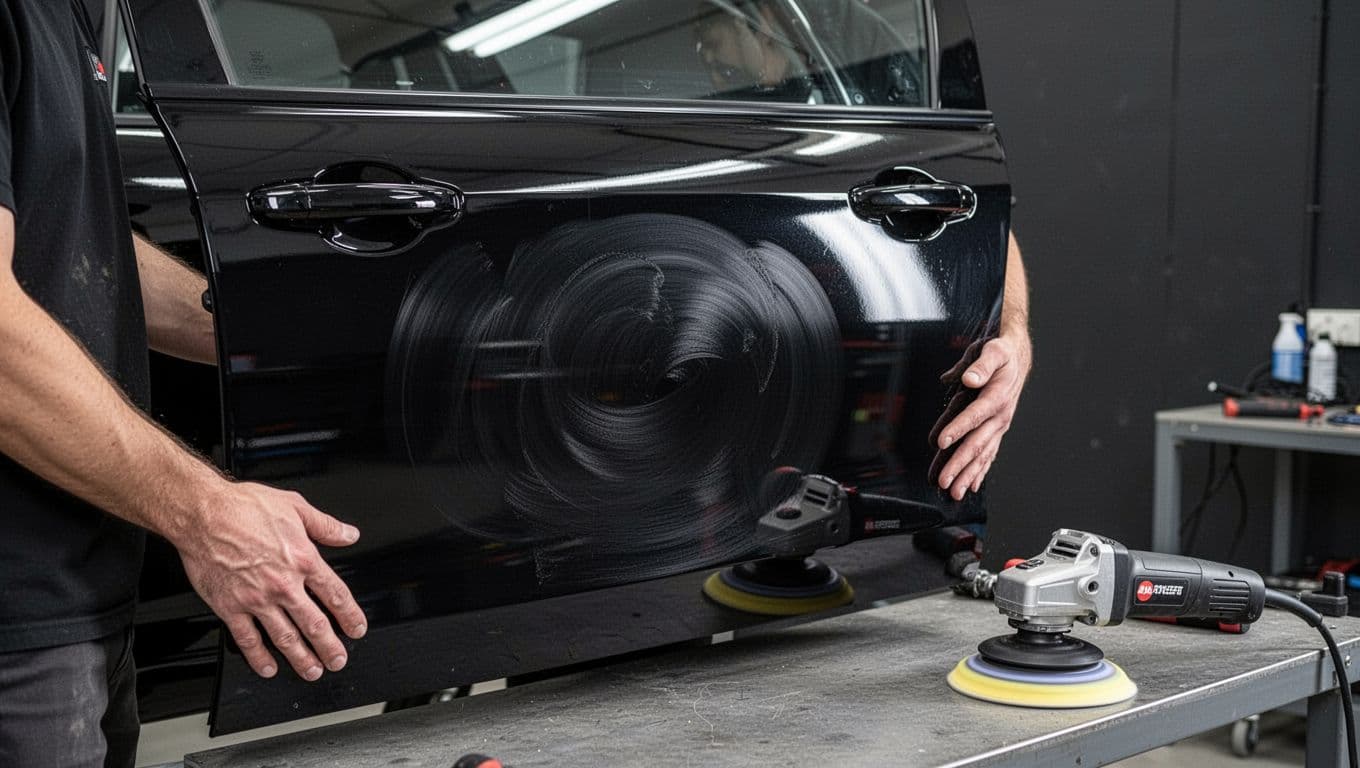
A dual-action polisher is a practical choice for many beginners, but it still needs care. Keep the pad flat, use moderate pressure, avoid sharp body edges, and clean the pad regularly. Don’t polish hot paint or allow product residue to dry hard on the panel.
Know when professional paint correction is appropriate
Professional correction is the safer choice when the marks cover most panels, the car has been polished before, or you aren’t sure how much clear coat remains. A trained detailer can inspect the paint, perform a test section, and select a suitable pad and polish combination.
A rotary polisher, heavy compound, or wet sanding should not be a first attempt on a valuable black car. These methods can create haze, burn edges, or remove too much clear coat when used incorrectly.
Professional correction also helps when defects are too deep for polishing. The right recommendation may be partial improvement, touch-up work, or repainting instead of chasing complete removal. A beginner paint correction video can help you understand the process before using a machine.
Protect the Finish Between Details
Once the paint is clean and corrected, protect it with a product designed for automotive clear coat. A quality sealant, wax, or coating can make future washing easier and reduce the need for frequent polishing.
Follow the product’s preparation and curing instructions. Protection won’t prevent every scratch, but it can reduce how strongly dirt bonds to the surface and help the car stay cleaner between washes.
Keep a small maintenance kit in the car or garage with clean microfiber towels, a paint-safe quick detailer, and separate wheel tools. Use the detailer only on lightly dusty paint when the product label allows it. Heavy dirt needs a proper wash, not a dry wipe.
If regular care is difficult in Dubai’s heat and dusty conditions, a professional exterior wash can reduce risky contact with the paint. Bud Car Wash also provides wax-and-polish services for owners who want careful cleaning and a refreshed finish without guessing at the correction process.
Conclusion
The safest way to reduce swirl marks is to stop adding them. Use a thorough rinse, clean paint-only wash media, separate wheel tools, plenty of lubrication, and soft microfiber towels for drying.
Light clear-coat marring may respond well to a mild polish and careful test spot. Deeper scratches need a professional assessment, and some damage shouldn’t be chased with increasingly aggressive products. With the right inspection and wash routine, your black car can keep its clean reflections and polished appearance for longer.
Get a price on detailing and surface protection
Shop #7, 44, 22nd Street, Ras Al Khor Industrial Area 2, open 24 hours. Tell us the car and we reply with a price and a time.
Would rather talk? Call +971 55 168 5050. Someone answers 24 hours.
See us first on Google
Google lets you choose the sites you want to see more of. Add Bud Car Wash as a preferred source and our car care guides show up more often in Top Stories and in Google’s AI answers.
Opens Google in a new tab. You can remove us again at any time.

Sammie O is the owner of Bud Car Wash, a 24 hour hand car wash and detailing shop at Shop #7, 44, 22nd Street, Ras Al Khor Industrial Area 2, Dubai. He writes the car care guides on this site based on work done in his own bay.
View All Articles