
Last updated 18 August 2026 by Sammie O, owner of Bud Car Wash in Ras Al Khor Industrial Area 2, Dubai.
A smooth-looking car can still feel rough under your fingertips. Road film, brake dust, industrial fallout, and overspray can bond to the clear coat after washing. For DIY owners, clay bar car paint care starts with one rule: remove contamination with plenty of lubrication and almost no pressure.
Using a clay bar safely isn’t about working harder. It’s about preparing the surface, keeping the bar clean, and stopping when the paint feels smooth. The process below helps you improve the finish without confusing decontamination with polishing or paint correction.
Want us to do it instead?
We do detailing and surface protection at our Ras Al Khor bay, 24 hours a day. Fill this in and we reply with a price and a time. The message writes itself, so you only tap send.
Would rather talk? Call +971 55 168 5050. Someone answers 24 hours.
Clay Bar Car Paint Care: What the Process Does
A clay bar removes bonded contaminants sitting on the upper surface of your vehicle’s clear coat. Washing removes loose dirt, but it may not remove fine particles that remain attached after the car is clean.
When you move a lubricated clay bar across the panel, it picks up this contamination. The paint often feels smoother, reflects light more evenly, and becomes easier to protect afterward. The Chemical Guys clay bar guide also places washing, lubrication, folding, and wiping at the center of the process.
What a clay bar removes
Clay is useful for contamination that feels like tiny bumps across the paint. Common examples include:
- Industrial fallout that settles on exposed panels.
- Fine brake dust and road film.
- Overspray from nearby painting or construction work.
- Tree residue and other bonded surface particles, when the product instructions allow it.
A clay bar isn’t a solvent. Thick tar, heavy sap, and some iron contamination may need a suitable chemical remover first. Use products made for automotive paint, follow their labels, and rinse away residue before claying.
What clay cannot repair
Claying doesn’t polish scratches, remove swirl marks, or correct oxidation. It also won’t repair peeling clear coat, faded paint, deep stains, or damage that has changed the paint surface itself.
The finish may look brighter after claying because the surface is cleaner. That improvement isn’t the same as correction. If the paint still looks hazy or scratched, polishing is a separate step that requires the right product, pad, and technique.
A clay bar removes what is bonded to the surface. It doesn’t remove defects inside the paint or clear coat.
Prepare the Vehicle Before Claying
Good preparation reduces the chance of dragging dirt across the finish. It also makes the clay glide more consistently, which supports safer and more even results.
Wash and dry the paint completely
Park the vehicle in shade and let the panels cool before starting. This is especially important in Dubai, where direct sunlight can heat exterior surfaces quickly.
Wash the car with an automotive shampoo and a clean wash mitt. Rinse each panel thoroughly, then dry the vehicle with a clean microfiber drying towel. Don’t clay over loose grit, standing water, or a visibly dirty surface.
If the paint has heavy tar, sap, or metal contamination, deal with that before using clay. Always check whether the chosen chemical product needs extra rinsing or a second wash.
Gather the right materials
Keep the work area clean and prepare everything before touching the paint. You will need:
- A clay bar designed for automotive exterior paint.
- The manufacturer’s recommended clay lubricant.
- Clean microfiber towels.
- A wash bucket and automotive shampoo.
- A second towel or clean surface for placing the clay.
Don’t substitute plain water for lubricant. Water doesn’t provide the same slick surface, and a dry or under-lubricated panel increases the chance of sticking and marring.
Read the product instructions before use. Clay bars differ in grade, texture, and cleaning requirements. Some products may allow a specific lubricant or cleaning method, while others require different care.
How to Use a Clay Bar on Car Paint Safely
Work one small section at a time. A quarter of a hood or half of a door is easier to control than an entire panel covered with drying lubricant.
Test a small area first
Choose a small, less noticeable section and apply lubricant generously. Flatten a clean piece of clay into a manageable shape, then place it lightly on the wet paint.
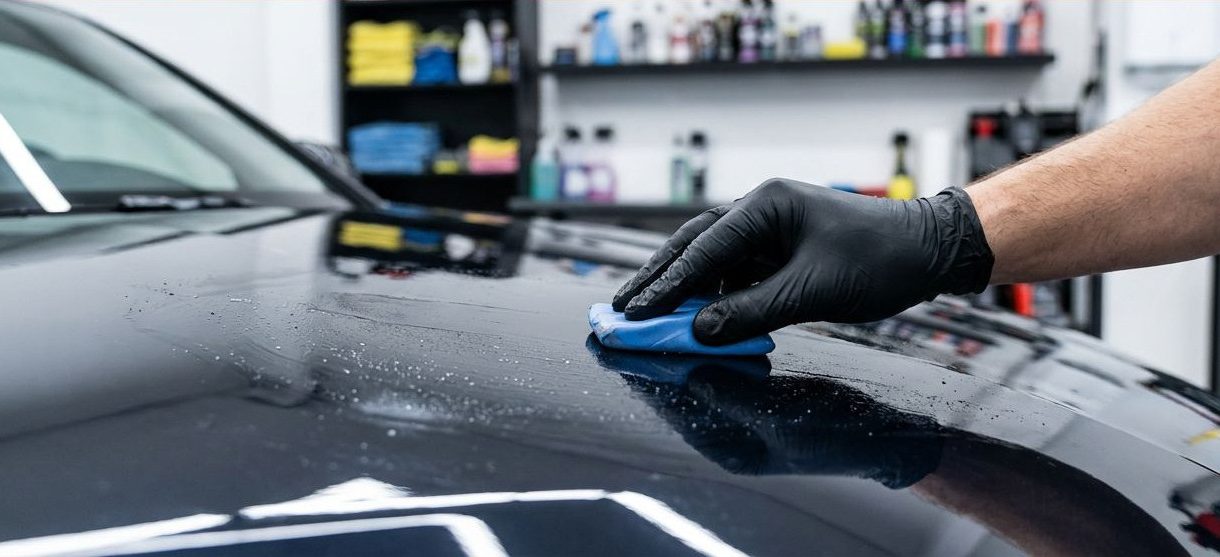
Move the clay in straight back-and-forth passes. Use light hand pressure and let the lubricant provide the slip. You may feel or hear roughness at first. Continue only until the bar glides smoothly and the surface feels clean.
Wipe the area with a clean microfiber towel and inspect it. Check for haze, streaking, or fine marks before moving to the rest of the vehicle. If the test area doesn’t look right, stop and review the lubricant, surface temperature, and clay condition.
Lubricate, glide, fold, and wipe
Spray enough lubricant to keep the section visibly wet. Don’t allow the product to dry while you work. Reapply it whenever the clay begins to drag or the panel feels less slick.
The bar should glide with minimal pressure. Avoid circular motions because straight passes make it easier to control coverage and identify where contamination remains. The Car and Driver clay bar instructions also recommends a lubricated surface, back-and-forth movement, and light pressure.
After several passes, wipe away the residue with a clean microfiber towel. Inspect the clay. Once one face becomes dirty, fold it inward and expose a clean section. If the bar falls onto the ground, don’t put it back on the paint. Discard it unless the product manufacturer clearly provides a safe cleaning method.
A visual detailing demonstration can help beginners understand the correct movement. The key is a slow, smooth glide rather than pressure or speed.

Troubleshoot Sticking, Marring, and Rough Paint
Most clay bar problems come from three areas: too little lubricant, a dirty bar, or excessive pressure. The correct response is to stop and inspect, not to work harder.
If the clay bar sticks
Sticking usually means the panel has dried, the surface is too warm, or there isn’t enough lubricant. Stop moving the bar and spray more product over the area.
If the panel is hot, move the vehicle into shade and allow it to cool. If the lubricant has dried into residue, wipe or wash the section according to the product instructions before starting again.
Never force a stuck bar across the paint. Pulling harder can leave marks and can spread contamination across a larger area.
If the paint looks hazy or marked
Stop immediately if the finish develops haze, fine scratches, or cloudy marks. Remove the clay residue, wash the area if needed, and inspect the bar for embedded dirt.
Marring can occur when the clay is contaminated, the panel is under-lubricated, or too much pressure is used. Light marring may need polishing to remove. More claying won’t correct it and may make the finish worse.
Test a clean section again with fresh clay and more lubricant. If the same issue continues, leave the vehicle and arrange a professional paint assessment.
If the paint still feels rough
A rough panel after claying may have remaining tar, sap, iron particles, or other contamination that clay alone didn’t remove. It can also indicate that the bar wasn’t folded often enough or that some areas weren’t covered.
Inspect the panel in good light and review the manufacturer’s cleaning instructions. Use a suitable chemical decontamination product when appropriate, then rinse and dry the surface before another test.
Don’t keep claying a panel that remains rough after repeated, careful passes. Oxidation, clear coat failure, and etched stains require a different correction plan.
Inspect and Protect the Finish
Once every panel is complete, remove any remaining lubricant or residue. Use clean microfiber towels and turn them often so you aren’t spreading removed contamination back onto the paint.
Dry and inspect each panel
Check the paint by touch and under bright, even lighting. Look for missed areas, streaks, haze, or marks. Pay extra attention to horizontal surfaces, lower doors, bumpers, and areas near the wheels because they often collect more contamination.
If the surface still feels rough, don’t assume more pressure will solve it. Recheck the clay, lubricant, and chemical decontamination steps first.
Apply fresh protection
Claying may reduce existing wax or sealant, depending on the product and technique. Once the paint is clean and dry, apply a suitable wax, paint sealant, or ceramic protection product according to its instructions.
Wax can provide a fresh layer of gloss and protection. A sealant may be preferred for longer-lasting maintenance. Ceramic products require careful preparation and curing conditions, so follow the coating manufacturer’s directions rather than using general advice.
Avoid applying protection in direct heat if the product label recommends a cool surface. Work in shade, use clean applicators, and remove residue within the stated time.

A wash, clay, and seal demonstration can provide a useful visual reference for the order of these steps. The correct sequence is clean paint, controlled decontamination, careful inspection, and fresh protection.
When Professional Detailing Is the Better Choice
DIY claying works well when the paint is in fair condition and the contamination is easy to identify. Professional detailing is a better option when the vehicle has delicate paint, extensive fallout, heavy overspray, deep oxidation, or previous marring.
A trained detailer can assess the finish before work begins. The service may include a thorough wash, chemical decontamination, clay treatment, paint inspection, light polishing, and wax or sealant application.
Professional care is also useful when you want a consistent finish across the entire vehicle without guessing which product or technique is suitable. Careful workmanship protects the appearance of the paint and reduces the risk of unnecessary correction work.
Conclusion
A clay bar can make car paint feel smooth again, but only when the surface is washed, cool, well lubricated, and handled with light pressure. Work in small sections, fold the bar often, and discard it if it touches the ground.
Remember the limit of the process. Claying removes bonded contamination, while scratches, swirl marks, and oxidation require polishing or other paint correction. Finish your clay bar car paint care with a clean inspection and fresh wax, sealant, or ceramic protection, then maintain the surface with regular gentle washing.
Get a price on detailing and surface protection
Shop #7, 44, 22nd Street, Ras Al Khor Industrial Area 2, open 24 hours. Tell us the car and we reply with a price and a time.
Would rather talk? Call +971 55 168 5050. Someone answers 24 hours.
See us first on Google
Google lets you choose the sites you want to see more of. Add Bud Car Wash as a preferred source and our car care guides show up more often in Top Stories and in Google’s AI answers.
Opens Google in a new tab. You can remove us again at any time.

Sammie O is the owner of Bud Car Wash, a 24 hour hand car wash and detailing shop at Shop #7, 44, 22nd Street, Ras Al Khor Industrial Area 2, Dubai. He writes the car care guides on this site based on work done in his own bay.
View All Articles