
Last updated 19 August 2026 by Sammie O, owner of Bud Car Wash in Ras Al Khor Industrial Area 2, Dubai.
Dust, sand, water spots, and bird droppings can quickly dull a panoramic roof. To clean panoramic sunroof glass safely, you need the right products and a gentle process that protects the glass, frame, drainage channels, and rubber seal.
The glass and seal need different care. Clean the glass with a suitable automotive product, then wipe and condition the rubber separately. Start with a cool vehicle in the shade, and work carefully around every edge.
Want us to do it instead?
We do window and glass protection at our Ras Al Khor bay, 24 hours a day. Fill this in and we reply with a price and a time. The message writes itself, so you only tap send.
Would rather talk? Call +971 55 168 5050. Someone answers 24 hours.
Prepare the Roof Before Cleaning
A clean panoramic sunroof starts with preparation. Park on level ground, switch off the vehicle, and allow the roof to cool before applying water or cleaning products. Hot glass can dry products too quickly and leave marks.
Check your vehicle’s owner’s manual before opening the roof or applying lubricant. Vehicle designs differ, especially around the drain channels and moving tracks. Toyota, for example, includes model-specific cleaning and maintenance instructions in its official owner’s manuals.
Have these supplies ready:
- pH-neutral car shampoo
- Clean microfiber towels
- A soft detailing brush
- An automotive glass cleaner safe for tinted film
- A separate towel for the rubber seal
- Low-pressure, clean water
- A rubber-safe silicone product, only if the owner’s manual allows it
Use separate towels for the glass and seal. Grit collected from the frame can scratch the glass during the final wipe.
How to Clean Panoramic Sunroof Glass
The glass is usually the most visible part of the roof, but it also collects fine particles that can create scratches. A gentle wash removes contamination without forcing grit across the surface.
Remove Loose Dust and Sand First
Rinse the roof with a light stream of clean water. Keep the water pressure low, and don’t aim a concentrated spray directly at the seal, front edge, rear edge, or drain openings.
Never wipe dry dust from the glass. Sand can sit between the towel and the surface, creating fine scratches with every pass. In dusty climates such as Dubai, this first rinse is especially important.
Apply diluted pH-neutral car shampoo with a clean microfiber mitt. Move in straight, overlapping passes with light pressure. If bird droppings or dried spots don’t lift easily, soak them for a few minutes instead of scraping them.
Wash, Rinse, and Dry the Glass
Rinse the shampoo with low-pressure water, then dry the panel with a clean, plush microfiber towel. Turn the towel often so trapped dirt doesn’t remain against the glass.
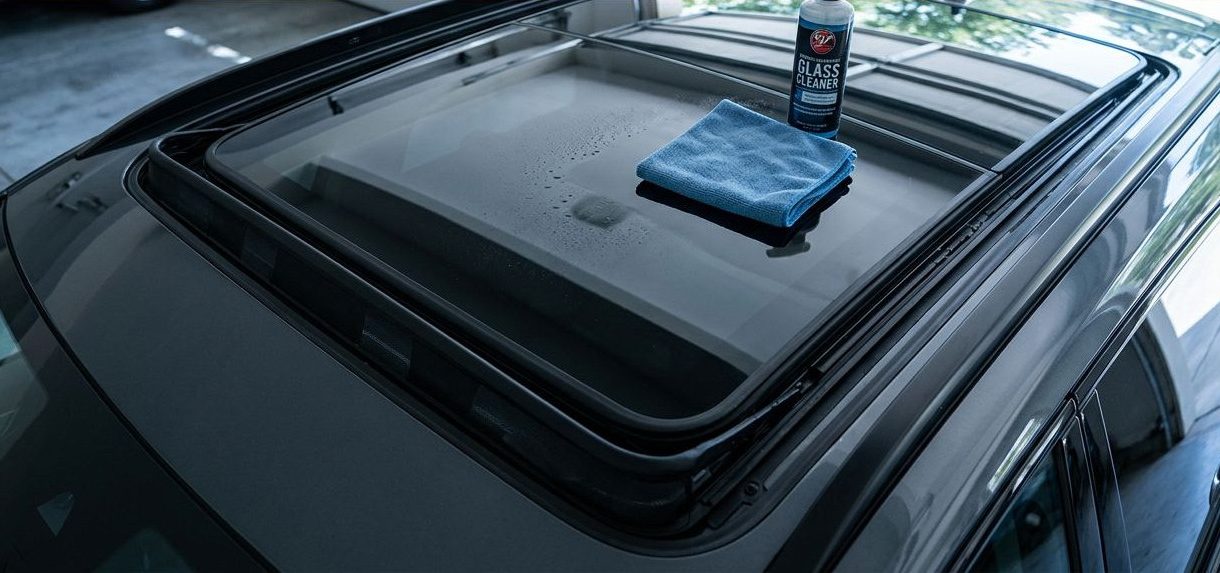
For fingerprints, mineral marks, or light film, use an automotive glass cleaner labelled safe for tinted film and surrounding trim. Spray the product onto the towel rather than flooding the roof. This gives you better control around the seal and prevents cleaner from running into the headliner.
Clean the inside of the glass with the roof closed. Use a lightly dampened microfiber towel, followed by a dry towel. Don’t spray directly toward the headliner, switches, interior shade, or electrical components.
Clean and Condition the Rubber Seal
The rubber seal needs a separate process. It protects the cabin from wind, dust, and water, but pulling, scrubbing, or applying the wrong chemical can cause premature damage.
Wipe the Seal Without Stretching It
Open the roof only after the exterior glass is clean and dry. Inspect the visible rubber around the panel. Look for cracks, flattened sections, lifting, hard spots, or areas that have pulled away from the frame.
Wipe the seal with a damp microfiber towel. Use a soft detailing brush for dust in the corners, but don’t press the brush into the rubber or drag it across with force. Avoid pulling the seal away from its channel.
A damp cloth is also the basic method described in this Mercedes-Benz owner’s manual guidance. Clean first, then inspect the condition before using any treatment.
Apply Only a Suitable Conditioner
Cleaning and conditioning are not the same task. Cleaning removes dust and residue. Conditioning helps an approved rubber surface stay flexible.
If your manual permits it, apply a small amount of non-greasy silicone product to a cloth, not directly onto the seal. Wipe a thin, even layer over the accessible rubber, then remove any excess with a dry towel. Test the product on an inconspicuous area first.
Don’t use petroleum jelly, engine degreaser, brake cleaner, adhesive remover, tire shine, or household solvents. These products can leave residue, attract dust, or affect rubber and nearby trim. Avoid overapplication because excess lubricant can run onto the headliner and moving parts.
Inspect the Frame and Sunroof Drains
The frame and drainage tray collect water by design. A panoramic roof is not maintained by sealing every drop at the glass edge. Its channels guide water toward drain tubes, so keeping those areas clear matters.
Wipe the accessible frame and tray with a damp cloth. Use a soft brush to lift leaves and dust near the corners. Remove loose debris by hand or with a vacuum nozzle held near the opening.
Don’t push dirt into a drain with a wire, screwdriver, cotton swab, or stiff cable. Don’t blast the openings with compressed air or a pressure washer. Debris can move farther into the tube, where it may create a blockage that is harder to repair.
If your owner’s manual permits a water test, add a small amount of clean water to each drain corner. The water should move away and exit beneath the vehicle. A sunroof drain cleaning guide also recommends using a small amount of water to check drainage. Stop if the water rises, drains slowly, or remains in the tray.
Avoid Damage and Know When to Get Help
A pressure washer is too aggressive for a panoramic roof’s seal and drain openings. Keep it away from the roof edges, especially when washing the rest of the vehicle.
Avoid abrasive pads, razor blades, hard brushes, harsh solvents, and excessive force. Don’t operate the roof while grit remains in the tracks. Don’t force the glass closed if it binds, stops, tilts unevenly, or makes a grinding sound.
Professional service is required when you notice:
- Water on the headliner, pillars, seats, or interior trim
- A musty smell after rain or washing
- Standing water in the drainage tray
- A clogged drain that won’t clear with gentle cleaning
- A torn, shrunk, loose, or hardened seal
- Wind noise that wasn’t present before
- Glass movement that is slow, uneven, noisy, or incomplete
A leak can come from a blocked drain, damaged seal, loose glass, or a problem with the roof frame. Adding more lubricant won’t repair a torn seal. A qualified technician can inspect the drainage tubes, reseal the panel, and check the roof mechanism without causing further damage.
Keep the Roof Clean and Protected
When you clean panoramic sunroof glass, remove loose grit before touching the surface. Use gentle products on the glass, a damp cloth on the rubber, and only a manual-approved conditioner. Keep tools and strong water pressure away from the drains.
Regular light cleaning is safer than aggressive cleaning after months of buildup. If the roof already shows signs of leakage or unusual operation, stop the DIY process and arrange professional inspection. A careful service protects the clean finish and the parts that keep your cabin dry.
Get a price on window and glass protection
Shop #7, 44, 22nd Street, Ras Al Khor Industrial Area 2, open 24 hours. Tell us the car and we reply with a price and a time.
Would rather talk? Call +971 55 168 5050. Someone answers 24 hours.
See us first on Google
Google lets you choose the sites you want to see more of. Add Bud Car Wash as a preferred source and our car care guides show up more often in Top Stories and in Google’s AI answers.
Opens Google in a new tab. You can remove us again at any time.

Sammie O is the owner of Bud Car Wash, a 24 hour hand car wash and detailing shop at Shop #7, 44, 22nd Street, Ras Al Khor Industrial Area 2, Dubai. He writes the car care guides on this site based on work done in his own bay.
View All Articles